|
|
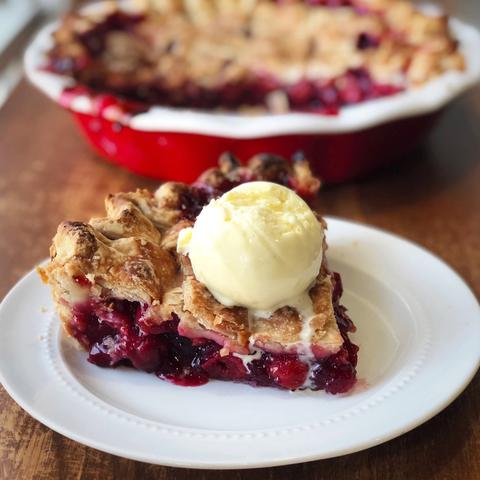
Pie Bar’s Tart Cherry Pie
Ingredients Crust
Note: This will make two dough balls -
2.5 cups All Purpose or Pastry Flour
- 1 teaspoon Salt
- 1 teaspoon Sugar
- 1 cup Unsalted Butter, cut into cubes
- ½ cup - ¾ cup Ice Water
Directions Crust
- Mix together flour, salt, and sugar.
- Add cubed butter. Using fingers or a pastry blender, cut in butter to flour until the mixture resembles a coarse meal.
- Place mixture back in the fridge for a minimum of ten minutes.
- Remove mixture from fridge and begin to add in water, 1tbs at a time.
- Incorporate water using a spatula and your hands until the dough comes together, but is not sticky.
- Make two even-sized dough balls. Wrap in plastic wrap, press into a disk shape, and place in the refrigerator to rest for a minimum of 1 hour before rolling.
Ingredients Pie Filling
- 6 cups Frozen or Fresh Tart Cherries
- 1 cup Sugar
- 1/2 teaspoons Almond Extract
- 3 Tablespoons Quick Cooking Tapioca -- "Minute Tapioca"
Pro Tip: If using Frozen Cherries, do NOT thaw them ahead of time
Ingredients Topping
- ¼ cup Heavy Cream
- 2 tablespoons Turbinado Sugar
Make Your Pie
- Preheat the oven to 425° F.
Pro tip: Use convection if you have it. It cooks faster and more evenly! - Roll out the bottom pie dough and place it in a deep dish pie pan. Set aside.
Pro tip: Spray the pie dish before putting the dough in! - In a large bowl, combine cherries, sugar, almond extract, and tapioca. Mix together until
completely combined.
Pro tip: Grind down your tapioca in a spice grinder first for a firmer set pie! - Pour filling into the pie dish. Using hands, press down gently and spread out filling evenly.
Set aside.
- Roll out the second pie dough and cut an even amount of strips to create a lattice pattern
on top.
Pro tip: You can make the strips as thick or as thin as you like! I like a 1” thick strip. - Place strips across the top of the pie filling, weaving every other strip to create a basket
pattern.
- Brush the lattice strips and edges of the pie with heavy cream and top with turbinado
sugar.
- Place the pie in the oven on the bottom rack. Bake for 25 minutes.
Pro tip: Bake this pie on a baking sheet! It will drip and this will help with clean-up. - Reduce heat to 375° F and continue to bake for an additional 45 minutes.
- Rotate pie 180° and continue to bake for approximately 35 additional minutes. Once the
pie crust is golden brown and the pie filling is continuously bubbling near the center,
remove the pie from the oven.
Pro tip: Do not be alarmed by the amount of time it takes to bake this pie. You need an
extended bake time so the filling and pie crust can cook completely. The filling must
bubble for a couple of minutes for your pie to set! Note: if you use FRESH cherries, your
bake time may be a bit shorter. - Allow the pie to cool on a baking rack for at least 4 hours, but overnight is better.
Pro tip: If you cut into your pie while it is still warm, it will not set properly and you will
end up with a runny pie. It is better to wait until it is completely cooled to let it set.
Serve a slice of pie by heating it up slightly and adding a scoop of vanilla ice cream!
This pie will last in your refrigerator for up to 7 days.
|
|

Shop for Rolling Pins... |


